Virtual Machine Lighting
Adjusting the lighting
VM supports up to eight different lights, which can be placed strategically around or even inside the machine. Each light consumes a little more GPU, so if graphic performance is a problem you might try reducing the number of lights being used. Unlike in the real world, solid objects do not affect VM lights. Lights shine through objects, do not cast shadows, and the lights themselves are not visible in the simulation window.
Lighting will normally not need to be adjusted. If the simulation window is completely dark, it might not necessarily be due to a lighting problem. Even with all lights off, VM provides a certain amount of ambient light. Before adjusting the lights, first make sure that the viewpoint is back and away from the machine (to do so, first press the Ctrl spacebar shortcut, and then press and hold the down-arrow to pan back). If the machine is visible, but too dark or too light, select Simulation»Lights (Ctrl Alt L shortcut) to bring up the Light dialog.
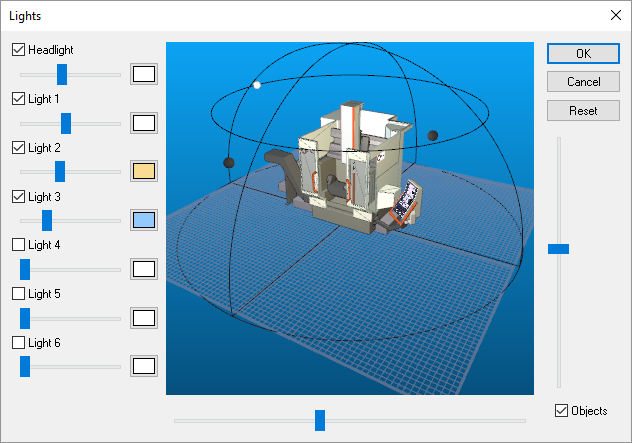
The horizontal slider rotates your viewpoint around the machine. The vertical slider changes the viewing distance. Lights appear as small boxes, but you may have to hide the machine (clear the “Objects” check box) to see them. Lights are positioned on a hemisphere using the left and right-mouse buttons. The left-mouse button controls the position on the hemisphere. The right-mouse button controls the size of the hemisphere. To adjust the light, place the mouse pointer over the light and then press and hold either the left or the right-mouse button. Move the mouse to change the lighting position or distance.
Light intensity is controlled by the individual sliders associated with each light. The color of each light can be adjusted by first selecting the box to the right of the intensity slider and then choosing a color from the color chart. Using different colors for your light sources will improve depth perception.
If a light appears immovable, perhaps the distance has been set to a very small value. In this case, use the right-mouse button to increase the lighting distance. It is also possible to position a light so far away that it can no longer be selected. In this case, the Reset button can be used to set all lights to their default positions.
Pressing the Reset button in CERUN and GENER sets the lighting to the default as defined and saved in the model by QUEST. Pressing the Reset button in QUEST sets the lighting to a built-in default based on the grid size.